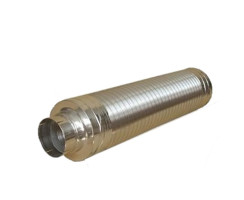
Hot Shower Kit 2.0
The original by tigerexped - but now even better!
The Hot Shower Kit is the simple way to equip travel vehicles or boats & yachts with an air heater and simultaneous hot water. Unlike technically complex combination devices, the kit consisting of two individual devices is more cost-effective, but above all, it is less prone to failures. And if necessary, it can even be repaired when travelling.
The strength of the Hot Shower Kit lies in its simplicity, and the two main elements (heater and boiler) working separately from each other. Defects in one component do not automatically affect the other. A defect in the boiler is unlikely due to the high material and processing quality with high pressure resistance - but should damage occur, for whatever reason, the heating continues to run completely unimpressed and that's a good thing.. Because not being able to take a hot shower is one side of the coin - spending the night in a completely cooled-down vehicle at possibly -20 degrees Celsius is the other.
So, the Hot Shower Kit 2.0 is a simply designed and easy-to-install system. Therefore, it's perfect for a diy campervanconversion, but of course also for the professional manufacturer who wants to offer their customers a reliable and maintenance-friendly solution for their travels.
How Does the Hot Shower Kit 2.0 Work
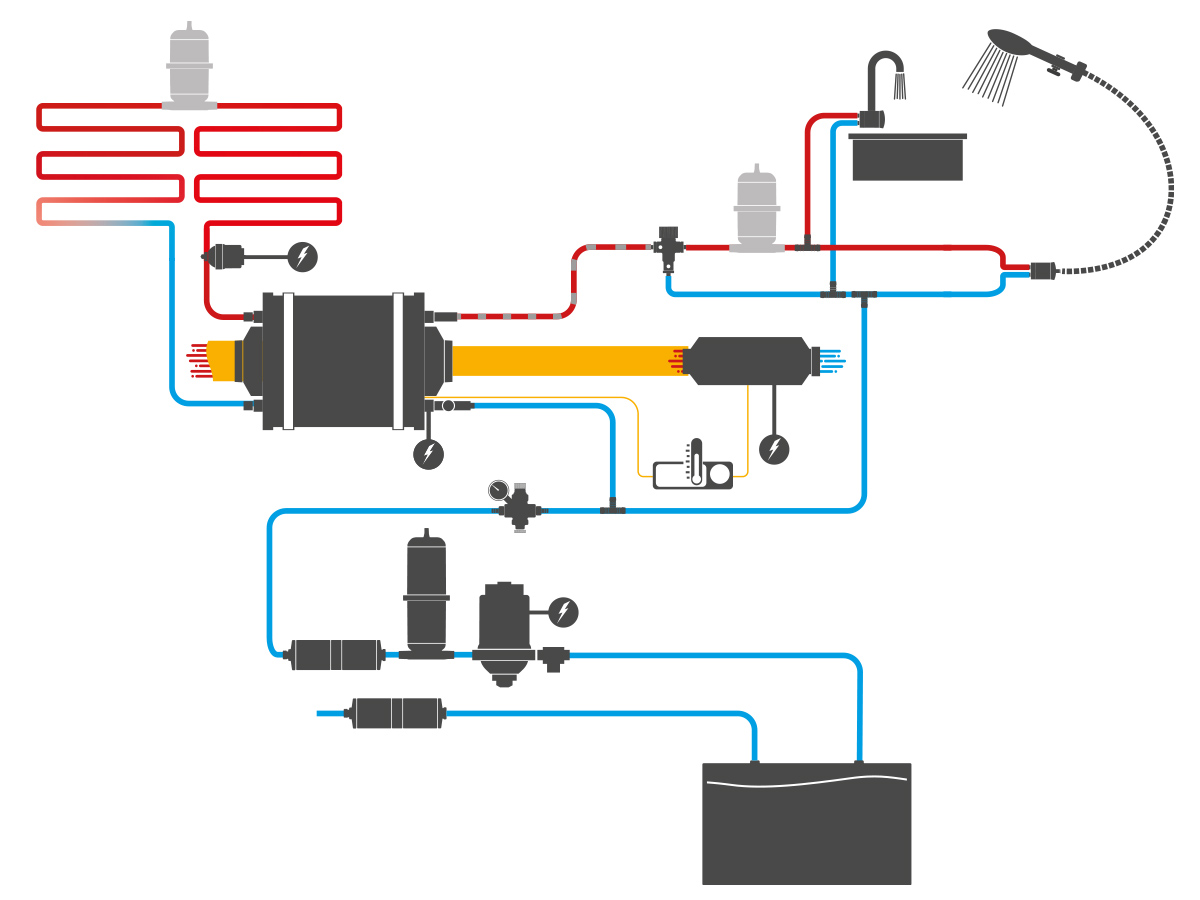
The Hot Shower Kit 2.0 can generate hot water in three different ways:
- Through an electric heating element, meaning via electricity when you have sufficient reserves or are connected to shore power.
- Simply while the air heater is running - completely without consuming additional energy. Hot water is a "by-product" here!
- NEW: The boiler can be integrated into the engine's coolant circuit in order to heat either the domestic water or a second water loop. Conversely, the engine can also be preheated to make starting more gentle (not suitable for use in arctic temperature areas).
Each of these three options has its advantages and can be used when it fits best. After several days of self-sufficient camping in hot weather, for example, you probably don't want to run the heater, nor is the water heated from driving. However, if it's too warm for the heater, there is likely solar energy available, meaning enough power in the batteries to generate hot water through the electric heating element.
This kit offers the perfect solution in every situation by combining these three options.
The options for integration into the coolant circuit are as follows:
- Coolant circuit heats domestic water: In this configuration, the coolant circuit is connected to the boiler, and while driving, it heats domestic water for shower and other uses. (Caution: As the coolant temperatures can rise above 100°C due to pressure, overheating of the boiler must be prevented through a valve or by shutting off the circulation pump!)
- Boiler preheats the coolant circuit (engine): This means the reverse of the above function. By connecting the boiler to a 230V/110V power source or using warm air from the heater, the engine's coolant can be preheated.
-
Heating a second water loop: In this setup, energy led into the boiler via the electric heating element or warm air is fed into a second water circuit using a circulation pump. It's also possible to connect both water circuits (so that the engine's coolant circuit heats the second water loop). However, precautions must be taken regarding the outlet temperature from the engine.
NEW: Integration of a Second Water Loop
With combiBOIL, it is possible to operate a second water loop with hot water. This allows, for example, the implementation of underfloor heating or towel radiators to more easily dry wet clothing and towels inside the vehicle.
Note that the water must then be circulated by a circulation pump.
On the term "underfloor heating"
The underfloor heating with a Hot Shower Kit is not intended to heat the volume of the room like in a house. The energy is certainly not sufficient for this. However, if you lay 2-3 square meters of heating loop in the seating area, cold feet and an unpleasant feeling caused by a cold vehicle floor will definitely be a thing of the past and the cozy warmth from below will create a completely different feel-good atmosphere in your camper.
What Do You Get with the Hot Shower Kit 2.0
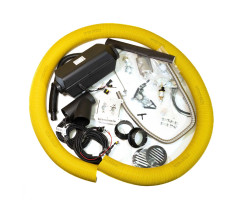
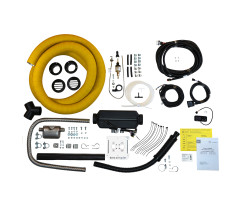
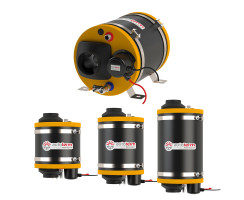
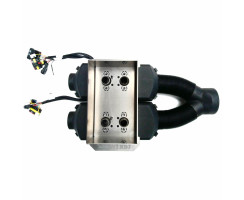
The Hot Shower Kit 2.0 consists of two main components (heater and boiler) and materials to connect them and install them in a way that creates a perfectly functioning system.
The Heater
The diesel heaters from Autoterm, using the two models Air 2D and Air 4D for our Hot Shower Kit, have become indispensable for travel vehicles, boats, and yachts. For many years, the robust heating devices from the Latvian manufacturer have proven themselves and enjoy an excellent reputation.
Important for self-builders: The installation can be done by laypersons without voiding warranty (the manufacturer's instructions for installation must be observed! A case of damage must be checked with the seller and complaint to Autoterm made by him). Additionally, the heating devices bear an e-mark, which means that installation does not need to be approved by TÜV.
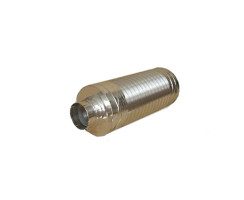
Autoterm heaters are fuel-efficient and quiet in operation. For even less noise, you can refer to our separately available Schlafgut Silencer.
ATTENTION: More information about the heaters:
Please note the product description of the Autoterm Air 2D and Autoterm Air 4D heaters for functions and features such as heating modes, altitude kit, etc. The heaters are used in our warm shower kits as described there and do not differ from the devices sold individually.
Also read this article (German language only by now) about the purpose of the 2 x 2 kW heating output set (twin kit), which contains a lot of noteworthy information on choosing the right heater size.
Please select the appropriate heater (according to heating output and vehicle voltage) for your project in the dropdown menu.
The Boiler - tigerexped & Autoterm combiBOIL
NEW AND IMPROVED: The new combiBOIL hot water boiler is an unrivaled quality product, made in Western Europe, and it's the only one with an integrated thermostat in the versions with heating elements for 230/110V operation (an optional thermostat module for 12/24V operation will be available shortly).
combiBOIL can be monitored and regulated via the Autoterm Heater control panel: For the first time, the heater can now automatically regulate the temperature of the boiler through the corresponding settings on the control panel. The use of a manually operated control flap to redirect warm air before reaching the boiler becomes unnecessary for most applications. This effectively prevents overheating with dangerous steam generation in the boiler. Only in cases of extremely high heating requirements (e.g., arctic temperatures with suboptimal insulation) a control flap is still useful.
An automatic frost protection can also be set on the control panel: If the water temperature drops to 2°C, the heater automatically heats the water to +15°C and the ambient air to +7°C. For winter storage, of course, the water should be drained from the system, which is possible through a dedicated drain valve on the boiler. However, if the vehicle is left unattended for a short period, this function can prevent the need to make the entire system frost-proof with a lot of effort. With the Hot Shower Kit 2.0, it will still be effectively protected against frost damage.
The combiBOIL hot water boiler is available with 7L, 9L, and 12L volume. Our recommendation: 7L is sufficient for two people. The water heated in the boiler can reach a temperature of 80°C (depending on the heating method). By mixing in cold water, significantly more than 7L of comfortably warm shower water will be available in the end.
Keep in mind: More volume not only has advantages. More volume requires more space, the heating time also increases with higher volume, and heating, especially in the case of electric heating, consumes more energy. Lastly, a corresponding amount of water must be carried and collected in a wastewater tank. An unnecessary excess of power and volume quickly becomes a disadvantage.
We recommend the 9L boiler for three or more people, and the 12L boiler for four or more people.
For more details about the boiler itself, see VAR35926.
Please select the appropriate size and Power for your project from the dropdown menu.
What Else Is Included
The heater comes with an installation kit and control panel:
- Heating unit(s) as selected (with 2kW, 4kW, or 2x2kW heating power for 12V or 24V onboard voltage),
- Ready-to-use wiring harness with AMP SuperSeal connectors,
- Stainless steel exhaust muffler (17 x 9 x 5 cm),
- Fuel pump,
- Air intake silencer (for the heating burner, not the hot air!),
- Fuel line,
- Comprehensive assortment of small parts for installation.
- Control panel Autoterm Comfort Boiler Control, which can regulate both the heater and the boiler. For information about available heating modes, see Autoterm Comfort Control Standard.
The detailed specifications for the available heating units can be found in the product descriptions: Autoterm Air 2D with 2kW / Air 4D with 4kW.
- 1x combiBOIL hot water boiler with 7L, 9L, or 12L capacity, with stainless steel tank and heat exchanger
(For all specifications, dimensions, and a detailed description, see combiBOIL hot water boiler)
Additionally Required for Your Installation (depending on your project)
Every vehicle is different, so some things cannot simply be included in the package. Depending on the situation, installation location, etc., you'll need to select what's suitable for your specific land or water vehicle.
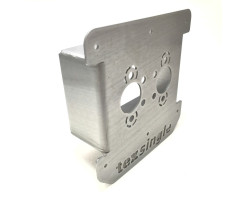
Heater Mount / Installation Flange
The heater can be installed without a mount, but this is more complex and comes with the risk that the hole pattern might not match precisely, creating tensions or inadequate heat dissipation. Therefore, it's generally advisable to use a mount or our installation flange, which simultaneously simplifies the installation process and provides good thermal isolation.
Mounts are available in different designs for various floor thicknesses or for installing the heater in a box. For the Hot Shower Kit, a mount like this one is typically used. However, in the Heater Accessories section, you can also find mounts for other special applications.
Water Hoses
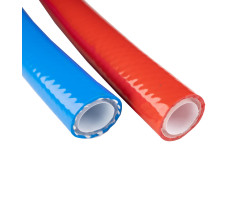
Similar to mounts, the situation with hose lines in the water system is individual for every vehicle. Calculate the length of both hot and cold water hoses once you've determined the installation positions for the heater, boiler, and all other water system components, and order accordingly.
Important:
If the water is intended for drinking or cooking, we strongly recommend looking for the appropriate certification of the hoses. This ensures that no harmful substances transfer to the drinking water and that the material does not alter the taste and composition of the water.
Drinking water-certified hose lines are available here for both hot and cold water.
In our range, you'll also find water filters for disinfection and safe drinking water consumption at any destination. For help in choosing the right filter, take a look at our online magazine's filter selection guide (German language only by now).
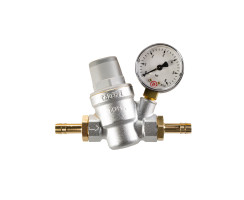
Pressure Regulator
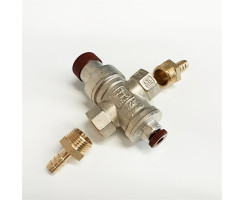
Our boiler tank is made of high-quality stainless steel and is precisely crafted. However, the input pressure should be limited to 1.5 bar.
In all pressurized water systems, as well as systems with immersion pumps with built-in or separate check valves, a pressure regulator should definitely be used in front of the boiler. It should be set to 1 to 1.5 bar. You can find pressure regulators with a pressure gauge or without pressure gauge under the following links.
By the way, the Warm Shower Kit 2.0 comes with a built-in safety valve that releases excess pressure, so there's no need to purchase it separately.
Water Pump
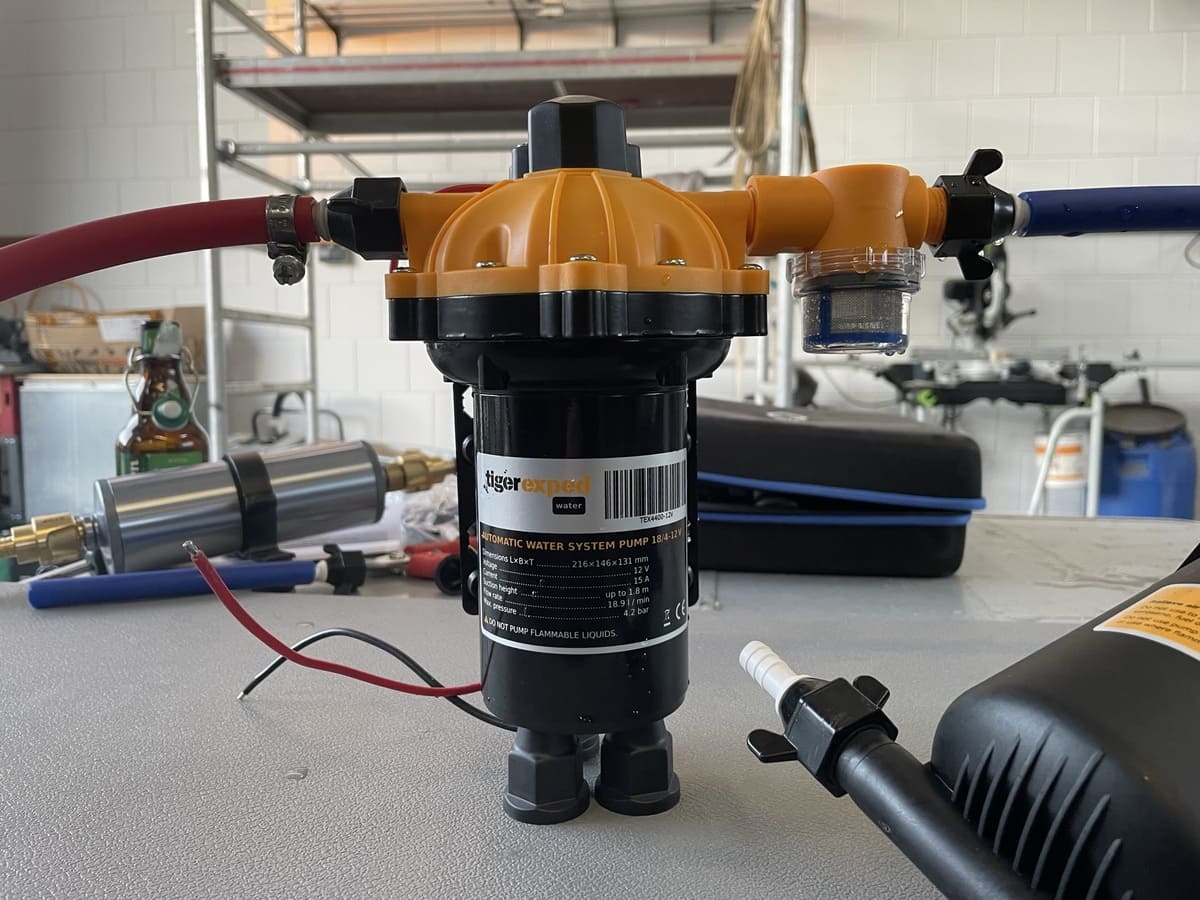
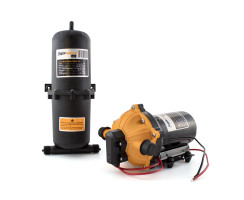
A decent pump provides the necessary pressure and circulation in the system. It must be strong enough to ensure good and even flow even when water is being filtered, allowing for a smooth operation of the water system. Longevity and reparability are also important factors. You can get this pump and a suitable accumulator tank to make the pressure water system even smoother and calmer as a bundle at a discounted price.
Das Autoterm Comfort Boiler Control (ACBC) Bedienteil regelt nur den Betrieb über die Luftstandheizung.
Elektrisches Aufheizen und Kühlkreislauf werden seperat gesteuert und überwacht, siehe dazu die nachfolgende FAQ.
Die Überwachung und Steuerung der Boilertemperatur geschieht je nach Aufheizart -elektrisch, Luftheizung, Wasserkreislauf- unabhängig voneinander.
Das heißt, das Boiler Control Heizungsbedienteil regelt nicht den elektrischen Heizsstab oder gar den Kühlkreislauf. Dafür sind Thermostat Relais -oder bei den 110/230V-Boilern die integrierte Regelung des elektrischen Heizstabes- da.
Bitte beachte die Anleitungen aller Geräte -Boiler und Relais- für die Steuerung und Überwachung deines combiBOIL!
Vorab jedoch zur generellen Information:
Ist der combiBOIL mit dem Autoterm Comfort Boiler Control (ACBC) kombiniert, so misst der Temperatursensor des ACBC konstant die Wassertemperatur des Boilers, wenn die Standheizung läuft. Steigt die so gemessene Boilertemperatur über 85°C, unterbricht das ACBC den Brennvorgang der Heizung und schaltet auf den Lüfterbetrieb um, bis die Boilertemperatur auf 75°C gesunken ist. Danach wird der Verbrennungsprozess fortgeführt. Diese Funktion bezieht sich ausschließlich auf das Erwärmen des Wassers mit der Autoterm Luftstandheizung.
Elektrisches AufheizenErhitzt man das Wasser elektrisch, ist für die 12V und 24V Variante des Boilers ein externes Thermostatrelais (TSR) im Lieferumfang enthalten (Boiler ab 11/23), welches die Boilertemperatur für den Elektrobetrieb misst und regelt, unabhängig vom ACBC. Die Ein- und Ausschalttemperatur ist im TSR Relais vorab zu definieren (siehe dessen Anleitung!). Steigt die Wassertemperatur über 65°C (empfohlene Einstellung), schaltet das Relais den Heizstab ab. Fällt sie auf 60°C (empfohlene Einstellung), so schaltet das Relais den Heizstab wieder ein. Die Anleitung des Thermostatrelais ist unbedingt zu beachten und ein Schalter vorzusetzen.
Für die 110V und 230V (nur 9L und 12L) Versionen des combiBOIL ist die Temperaturregelung im Boiler integriert. Der Heizstab schaltet bei fest eingestellten 65°C ab, und bei 56°C wieder ein. Wir empfehlen den Heizstab über einen beleuchteten Schalter mit dem 230V Netz zu verbinden, um eine bessere Kontrolle zu haben.
KühlkreislaufVerbindet man den Boiler mit dem Kühlkreislauf des Fahrzeugs ( Kühlwasserkreislauf-Kit ), so ist es ebenfalls notwendig eine Temperaturregelung zu integrieren. Dafür nutzt man ein weiteres TSR Temperatur Sensitive Relais, welches ebenfalls die Wassertemperaur im Boiler misst und mittels eines schaltbaren Bypasses das Kühlwasser temperaturabhängig durch den Boiler führt, oder daran vorbei.
Auch hier gilt, Anleitung des Temperatur Sensitiven Relais beachten! Bei einer Temperatur von 75°C (empfohlene Einstellung) sollte das Relais den Bypass umschalten und das Kühlwasser am Boiler vorbei pumpen. Bei 70°C (empfohlene Einstellung) schaltet das Relais zurück und das Kühlwasser fließt wieder durch den Boiler.
Beim Aufheizen via Luftstandheizung: Ca. 1 Stunde, und zwar egal bei welcher Boiler- und welcher Heizungsgröße).
Beim Betrieb über das Kühlmittel des Motorkühlkreislaufs ist eine Aufheizzeit von ca. 20min realistisch, wenn der Motor mit Betriebstemperatur läuft.
Über Strom richtet sich die Zeit nach der Leistung des Heizstabes. Soll z.B. ein 7-Liter-Boiler mit 300W Leistung von 15°C auf 65°C erwärmt werden, dauert das ca. 84 Minuten. Die Aufheizzeit kann dabei ganz seinfach selbst berechnet werden.
Rechne:
(Zieltemperatur in °C – Ausgangstemperatur in °C) x Boilervolumen in L x 1,2 / Heizleistung des Boilers in Watt x 60 = Aufheizzeit in Minuten.
Wenn du mehr über die benötigten Aufheizzeiten erfahren möchtest, schau mal in unseren umfangreichen Magazin-Artikel zu diesem Thema.
Es sollte ein Heizstab mit Bordnetzspannung (12 oder 24V) gewählt werden,
Ist ein Wechselrichter vorhanden, kann man dem Boiler über einen 230V Heizstab mehr elektrische Leistung zuführen, was folglich das Wasser schneller erwärmt.
Achtung: Der Handtuchtrocker darf nicht mehr Leistung haben, als die Heizung / der Heizstab in den Boiler einfließen lässt.
Es ist zu beachten, dass das System möglichst geradlinig verbaut werden muss, um effizient zu funktionieren. Für das kleinste Warmduscher-Kit (2kW-Heizung + 7l Boiler) werden mindestens 108cm Platz benötigt, bevor es individuell mit Warmluftverrohrung/-verteilung weitergehen kann.
Für alle anderen Setups, Heizungs- und Boilergrößen kann man grob die Längen der folgenden Komponenten addieren:
Alles was für jede Installation -in Fahrzeug oder Boot- gleichermaßen benötigt wird und nicht individuell ist, haben wir ins Warmduscher-Kit gepackt, sodass es im Prinzip ferig und funktionsfähig ist.
Folgendes könntest du, je nach der Ausgangssituation noch benötigen:
In unserem Sortiment findest du natürlich auch alle weiteren Komponenten zum Aufbau der gesamten Druckwasseranlage, wie zertifizierte Trinkwasserschläuche, Pumpen und Akkumulatortanks, Installationsmaterial wie Spannbackenschellen usw.
In unserem Online-Magazin gibt es einen ausführlichen Beitrag dazu, was in welchem Kit enthalten ist und noch benötigt werden könnte.
combiBOIL verfügt über ein Rückschlagventil welches verhindert, dass sich entstehender Druck "zurück" ausdehnen kann. Um Schläuche und Armaturen oder Duschköpfe vor Schäden durch zu hohen (Hitze-)Druck zu schützen, sollte also ein Druckspeichertank zum Einsatz kommen.
Bei langen Leitungswegen ist der Akkumulatortank nicht unbedingt notwendig, wenn sich der Druck im Leitungssystem verteilen kann.
Mehr Wissen zur Wasserinstallation, in unserem Online-Magazin
Welche Komponenten du für den Aufbau einer Druckwasseranlage im Camper brauchst, wie sie ausgewählt u. im System angeordnet werden.
Warmwasser im Camper ist mit recht einfachen Mitteln zu realisieren. Wir sprechen hier über die Möglichkeiten.
Druckwasserpumpe einbauen im Wohnmobil: Wo im Raum, wie verkabeln, mit welchem Material. Hier erfährst du, wie’s geht.
manufacturer information:
tigerexped GmbH & Co. KG
Weseler Str. 82
Alpen, 46519
NRW, DE
info@tigerexped.de
responsible person:
tigerexped GmbH & Co. KG
Weseler Str. 82
Alpen, 46519
NRW, DE
info@tigerexped.de
Item weight: |
20,50 kg |
All reviews:

